
How to Factory Reset a myQ Device
Factory reset your myQ device to restore original settings, remove it from an account, or resolve Error 310 (“device is on another account”). After reset, the device must be set up again in the myQ app.
When to Factory Reset
Only reset your device when:
- Moving the device to a new owner
- You see Error 310
- The device cannot be added after ownership transfer
- You are directed by troubleshooting steps
Do not reset for:
- Wi-Fi password or router changes
- App logout or sign-in issues
- Device showing offline
- Password or account login problems
For these situations, use:
- How to Reconnect to myQ after Changing your Router or Settings
- myQ App | Change or Reset Account Password
- Device Offline Troubleshooting
What a Factory Reset Does
A factory reset may:
- Remove the device from your myQ account
- Erase Wi-Fi settings
- Remove paired accessories
- Require full setup in the myQ app
For garage door openers, it also removes:
- Remotes
- Keypads
- HomeLink connections
- myQ accessories
These must be reprogrammed after setup.
Error 310
When you see Error 310, it means your myQ serial number is already linked to another account. A myQ device can only be added to one account at a time.
Common causes include:
- The device was previously owned or installed
- You moved into a home with an existing myQ device
- You used a different email address to register the device
- You no longer have access to the previous myQ account
How to fix it:
To clear the device from the old account, perform a factory reset using the steps below. This will remove the link to the previous account and allow you to register the device under your account.
See myQ Device Ownership | Moving, Taking Ownership, and Error 310 Help
Factory Reset Instructions
Follow the reset steps for your device type.
Performing these steps will also clear the device from any previous myQ account.
Internet Gateway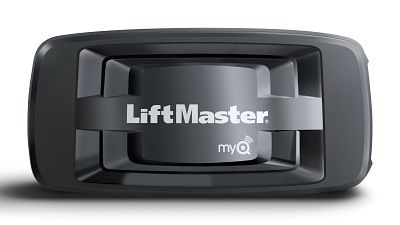 | myQ Garage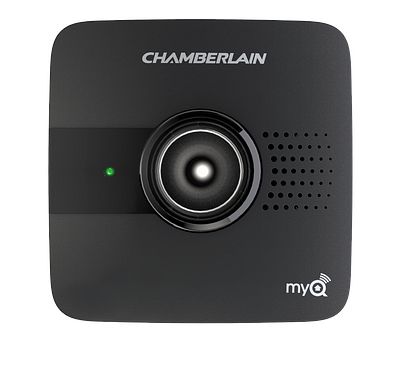 | Smart Garage Hub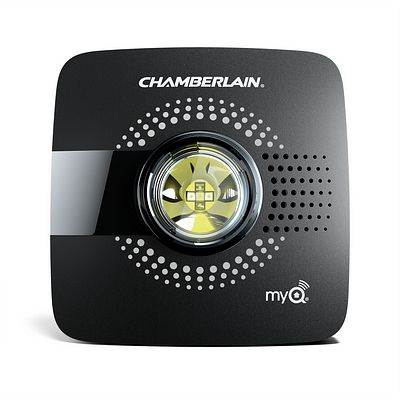 |
Smart Garage Control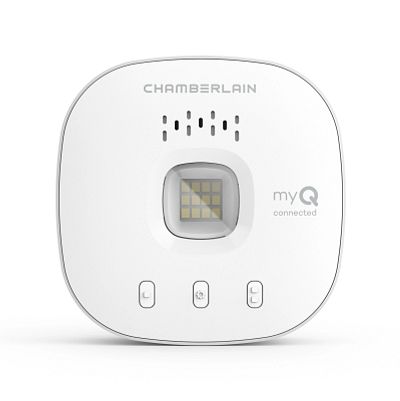 | Wi-Fi Garage Door Opener | myQ Integrated Camera |
myQ Smart Cameras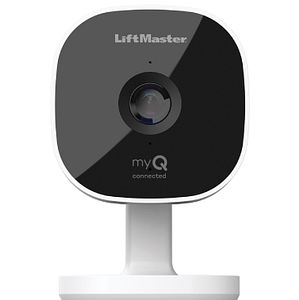 | myQ Video Keypad |
|
|
|
|
After Any Reset (Important)
If setup fails after reset:
- Restart your phone
- Confirm Bluetooth is enabled
- Confirm 2.4 GHz Wi-Fi
- Move closer to the device and router
- Retry setup once
Internet Gateway
- Unplug the AC adapter from the gateway.
- With a safety pin or paper clip, press and hold the reset button on the side of the gateway.
- While holding the reset button, plug the AC adapter back.
- Keep holding down the reset button until the yellow LED light blinks.
- Release the button.
What Success Looks Like
- Yellow LED blinks
- Device is removed from the previous myQ account
Next Step
Set up the gateway again in the myQ app. See How to Setup an Internet Gateway in the myQ App.
myQ Garage, Smart Garage Hub, or Smart Garage Control
- Press and hold the Settings button (gear icon) on the side of the hub until the blue LED blinks.
- Release the button.
- While the blue LED is blinking, press and hold the Settings button (gear icon) again until the blue LED pauses then blinks or the hub beeps.
- Release the button.
What Success Looks Like
-
- LED changes or hub beeps
- Wi-Fi settings are removed
- Device is removed from the current myQ account
If the Reset Does Not Work
- Confirm the hub has power
- Retry the steps once
- Ensure you are pressing the Settings button, not the Test button
If the LED never changes:
- Unplug the hub for 10 seconds
- Plug it back in and retry
Next Step
Set up the hub in the myQ app. See How to Connect a myQ Device to a Wi-Fi Network.
Wi-Fi Garage Door Opener
⚠️Important: Performing a factory reset on the garage door opener will erase all programmed remote controls, keyless entry devices, myQ devices, and HomeLink connections.
You will need to reprogram these after completing the reset.
Yellow & White Learn Button Models
- Press and hold the yellow or white learn button, the LED light next to it will turn on.
- Continue to hold until the LED light turns off, then release.
- Immediately press and hold the button again, until the LED light turns off again.
- Immediately press and hold the button a 3rd time, until the LED light turns off.
- You will hear 3 consecutive beeps indicating the reset was successful.
All Other Learn Button Colors
- Press and hold the learn button, the LED light next to the learn button will come on.
- Continue to hold until the LED light turns off, then release.
What Success Looks Like
-
- Wi-Fi settings are removed
- Device removed from account
- Accessories no longer operate the opener until reprogrammed
If the Reset Does Not Work
-
- Retry the reset steps slowly from the beginning
- Confirm the opener has power
- Confirm correct Learn button
If the opener does not respond:
-
- Unplug the opener for 30 seconds
- If your opener has a battery backup, disconnect the battery backup power as well
- Restore power and retry
Next Step
Reconnect the opener in the myQ app. See Connect myQ Wi-Fi Garage Door Opener to Wi-Fi.
Reprogram remotes, keypads, and HomeLink after setup is complete.
myQ Integrated Camera
Completing the steps below will remove the camera's Wi-Fi settings and disconnect it from the associated myQ account.
- Open the myQ Integrated Camera to expose the lens.
- Locate the reset button on the side of the camera.
- Press and hold the reset button for 5 seconds.
- Ensure you are firmly holding the reset button down and use a safety pin if needed.
- Wait for the blue LED above the lens to start flashing.
Note: If the camera does not have a reset button or the above steps do not reset the camera, complete a triple clear of the garage door opener. See Wi-Fi Garage Door Opener steps for instruction.
What Success Looks Like
-
- Blue LED flashes above the camera lens
- Camera Wi-Fi settings are removed
- Camera disconnects from the previous myQ account
Next Step
Set up the camera again in the myQ app. See How to Set Up a Garage Door Opener with Integrated Camera in the myQ App.
myQ Smart Cameras
Completing the steps below will remove the camera's Wi-Fi settings and disconnect it from the associated myQ account.
Note: If the camera was previously paired with Bluetooth, unpair it from your mobile device's Bluetooth settings.
- Open the the myQ app.
- Access settings by tapping the Gear Icon in the top right corner.
- Tap Devices or Device Management.
- Delete the camera from the device list.
- iOS: Swipe left and tap Delete.
- Android: Press and hold the device. Then tap Delete.
- Locate the pinhole near the side of the camera.
- With a safety pin or paper clip, press and hold the reset button on the side of the camera for at least 10 seconds.
- After releasing the reset button, you will see a white LED followed by a flashing blue LED above the camera lens, confirming the reset.
Set up the camera again in the myQ app. See
What Success Looks Like
-
- LED turns solid white
- LED changes to flashing blue
- Camera is ready for setup again
If the app cannot find the camera afterward:
-
- Restart Bluetooth on the phone
- Retry setup near the router
Next Step
Set up the camera again in the myQ app. See How to Set Up the myQ Smart Garage Camera in the myQ App
myQ Video Keypad
- Open the myQ app.
- Access settings by tapping the Gear Icon in the top right corner.
- Tap Devices or Device Management.
- Under Hubs, locate your Video Keypad.
- iOS: Swipe left and tap Delete.
- Android: Press and hold, and tap Delete.
- Tap Yes, to confirm you intend to delete your Video Keypad from the myQ app.
- On the Reset Your Device screen, follow the instructions to complete the factory reset process.
- This will require you to remove the Video Keypad from the wall to access the Factory Reset button on the back.
What Success Looks Like
-
- LED behavior changes
- Device is ready to pair again
If the Reset Does Not Work
-
- Confirm the battery is charged
- Remove and reinstall the battery
- Retry the reset
Next Step
Set up the video keypad again in the myQ app. See How to Set Up a myQ Video Keypad in the myQ App.
MyQ Outdoor Battery Camera
Models: myQ-C39VXXW, myQ-C39VCXW
- Open the the myQ app.
- Access settings by tapping the Gear Icon in the top right corner.
- Tap Devices or Device Management.
- Delete the camera from the device list.
- For IOS: Swipe left, and tap Delete.
- For Android: Press and hold the device. Then tap Delete.
- Press and hold the reset button on the bottom of the camera until the LED turns solid red.
- After releasing the reset button, you will see a solid white LED followed by a blinking blue LED above the lens, indicating the reset was successful.
What Success Looks Like
-
- LED changes from solid white to blinking blue
- Camera is ready for setup again
Next Step
Set up the camera again in the myQ app. See myQ Outdoor Battery Camera | How to Set Up.
myQ Video Doorbell
- Open the the myQ app.
- Access settings by tapping the Gear Icon in the top right corner.
- Tap Devices or Device Management.
- Delete the doorbell from the device list.
- For IOS: Swipe left, and tap Delete.
- For Android: Press and hold the device. Then tap Delete.
- Remove the doorbell from the mounting bracket:
- Using a Phillips #1 screwdriver, remove the security screw located at the bottom of the doorbell mounting frame.
- Push up from the bottom of the doorbell and firmly pull up and out toward you to detach it.
- Reset the doorbell:
- Press and hold the reset button on the back of the doorbell until the LED turns solid red.
- After releasing the reset button, you will see a solid white LED followed by a blinking blue LED above the lens, indicating the reset was successful.
- After you have completed these steps, see
What Success Looks Like
-
- LED changes from solid white to blinking blue
- Doorbell is ready for setup again
If the Reset Does Not Work
-
- Confirm the doorbell has power
Next Step
Set up the video doorbell again in the myQ app. See How to Set Up a myQ Video Doorbell
myQ Wireless Chime
Models: MYQ-W11AXXW
- Open the the myQ app.
- Access settings by tapping the Gear Icon in the top right corner.
- Tap Devices or Device Management.
- Delete the chime from the device list.
- For IOS: Swipe left, and tap Delete.
- For Android: Press and hold the device. Then tap Delete.
- Press and hold the reset button on the side of the chime until the LED turns solid red.
- Release the button. You will see a solid white LED followed by a blinking blue LED, indicating the reset was successful.
What Success Looks Like
-
- LED changes from solid white to blinking blue
- Chime is ready for setup again
Next Step
Set up the Wireless Chime again in the myQ app. See myQ Wireless Chime | Setup, Features, and Settings
Additional Resources


