Smart Garage Hub | How to Set Up in the myQ App & Pair to Opener
Control and monitor your garage door from anywhere by connecting a myQ Garage, Smart Garage Hub or Smart Garage Control to the myQ app. This guide walks through confirming your device, connecting it to Wi-Fi, pairing the door sensor, and linking the hub to your garage door opener.
➡️If you have a garage door opener with built-in Wi-Fi, do not use this article. Follow: Unable to Connect a Wi-Fi Garage Door Opener to Wi-Fi Overview
Before You Begin
You will need:
- A smartphone with the myQ app installed
- A 2.4 GHz Wi-Fi network. See Recommended Router Settings for the myQ Wi-Fi Products
- A strong Wi-Fi signal in your garage. See How to Improve Your Wi-Fi Signal
- Your Wi-Fi network name and password
- A compatible garage door opener
- For myQ Garage and Smart Garage, see Garage Door Openers That Are Compatible with the myQ Smart Garage Hub and myQ Garage
- For Smart Garage Control, see Garage Door Openers That Are Compatible with the Smart Garage Control
- A ladder to access the garage door opener and mount the hub
⚠️ Note: If you experience an error during setup, scroll to the Troubleshooting section for reset instructions.
Connecting Your myQ Hub
Setup in the myQ app for Apple iOS Users ⬇️
Step 1: Open the myQ App
- Open the myQ app and sign in or create an account.
Step 2: Add Your Device
- Navigate to Device Setup:
- If your app has a Gear Icon in the top right corner, tap the Gear Icon.
- If your app has a + Pus Sign in the lower right corner, tap the + Sign.
- Tap on Devices, then tap on Add a new device.
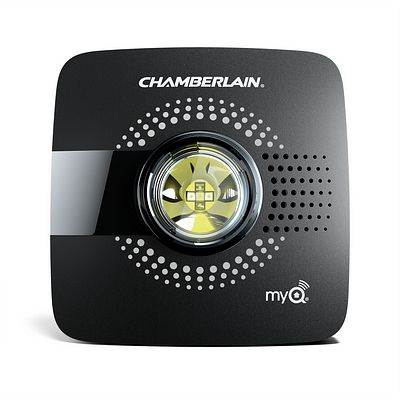
- Tap Smart Garage Hub then select your device from the list.
Step 3: Prepare your Hub
- Review the information on the What You Need screen and check each box to confirm you have all required items.
- Tap, I'm Ready to continue.
- Plug in your myQ Hub but do not mount it yet.
- Once it's plugged in, the LED should blink blue. If not, unplug and plug it back in.
- If it still doesn’t blink, reset the hub:
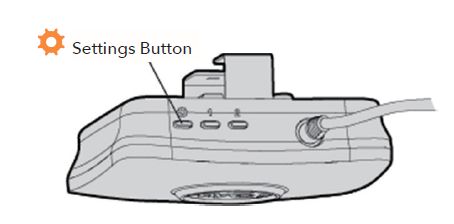
- Press and hold the gear button until the LED flashes blue, then release.
- Press and hold the gear button a second time, until the hub beeps.
- Unplug and then plug it back in.
Step 4: Connect to Wi-Fi
- Tap Yes if you have a blinking blue LED light.
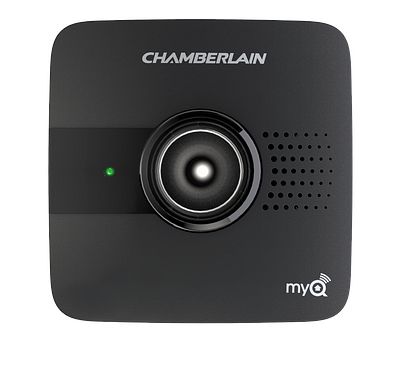
- If you are pairing a Smart Garge Hub (the black hub), Scan or enter the10-digit serial number on the back of the hub then, tap Done.
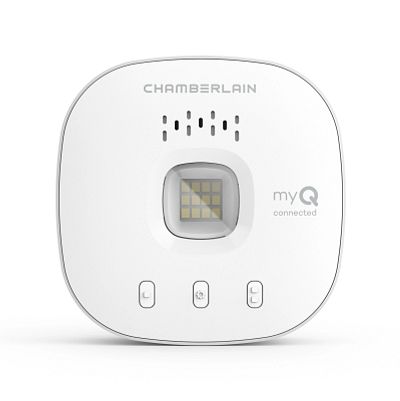
- If you are pairing a Smart Garage Control (the white hub):
- Tap myQ-NNN showing on the Discovered Screen.
- Tap Pair on the Bluetooth Pairing Request.
- Tap Join when asked if "Chamberlain" wants to join Wi-Fi Network "MyQ-NNN".
- Select your home Wi-Fi network and enter your password.
- Tap Next and wait for the device to connect.
- Hubs manufactured before 2/4/2021 require a firmware update that should take 2 to 4 minutes. The app will notify you when the update is done.
If Wi-Fi connection fails:
-
- Confirm the network is 2.4 GHz
- Confirm the router is within 50 ft
- Confirm the Wi-Fi password is correct
- Move the hub closer to the router
- If still failing, use the Troubleshooting section
Step 5: Set Up Door Sensor
- Remove the battery tab from your door sensor and tap Next.
-
Press the button to test sensor; hub should beep and flash, then tap Next.
- If it doesn't beep and flash, test the door sensor using this guide: How to Test the Door Sensor
- Go through the steps in the app to pair your door sensor to your hub, then tap Next.
Step 6: Pair to the Garage Door Opener
- Tap Next on the Door Sensor is Paired screen.
- Install the door sensor: Follow the in-app steps or watch the video.
- Note: If the door sensor is not properly installed on the garage door, the hub will not pair to the garage door opener in the app.
- Pair to garage door opener: Tap Next on the Pair to Motor screen.
- Read the warning and click Next.
- Use a ladder to access your garage door motor and tap Next.
- Select the brand of your garage door opener.
- Locate the learn/program button and tap Found It.
- If prompted, select the color of the learn/program button.
- This will be the same button you use to program remotes and keypads.
- Press and quickly release the learn/program button on your garage door opener motor head and tap Next.
- This will cause your garage door opener to move
- Finish setup: When the garage door opener is paired, tap Next.
- Name your garage door and tap Next.
Step 7: Mount the Hub
- Mount the hub per the app instructions.
- You can watch the video below or follow the in-app steps provided.
- Tap Finish when you have successfully installed the hub.
- Tap the garage door in the app to activate the door.
Setup in the myQ app for Android Users ⬇️
Step 1: Open the myQ App
- Open the myQ app and sign in or create an account.
Step 2: Add Your Device
- Navigate to Device Setup:
- If your app has a Gear Icon in the top right corner, tap the Gear Icon.
- If your app has a + Pus Sign in the lower right corner, tap the + Sign.
- Tap on Devices, then tap on Add a new device.
- Tap Smart Garage Hub then select your device from the list.
Step 3: Prepare your Hub
- Review the information on the What You Need screen and check each box to confirm you have all required items.
- Tap, I'm Ready to continue.
- Plug in your myQ Hub but do not mount it yet.
- Once it's plugged in, the LED should blink blue. If not, unplug and plug it back in.
- If it still doesn’t blink, reset the hub:
- Press and hold the gear button until the LED flashes blue, then release.
- Press and hold the gear button a second time, until the hub beeps.
- Unplug and then plug it back in.
Step 4: Connect to Wi-Fi
- Tap Yes if you have a blinking blue LED light.
- Tap MyQ-NNN in the Discovered screen.
- Select your home Wi-Fi network from the list, enter your password, and tap Next.
- Tap Next on the Added to Wi-Fi screen.
- Note: Hubs manufactured before 2/4/2021 require a firmware update for functionality. The update should take 2 to 4 minutes. The app will notify you when the update is done.
If Wi-Fi connection fails:
-
- Confirm the network is 2.4 GHz
- Confirm the router is within 50 ft
- Confirm the Wi-Fi password is correct
- Move the hub closer to the router
- If still failing, use the Troubleshooting section
Step 5: Set Up Door Sensor
- Remove the battery tab from your door sensor and tap Next.
-
Press the button to test sensor; hub should beep and flash, then tap Next.
- If it doesn't beep and flash, test the door sensor using this guide: How to Test the Door Sensor
- Go through the steps in the app to pair your door sensor to your hub, then tap Next.
Step 6: Pair to the Garage Door Opener
- Tap Next on the Door Sensor is Paired screen.
- Install the door sensor: Follow the in-app steps or watch the video.
- Note: If the door sensor is not properly installed on the garage door, the hub will not pair to the garage door opener in the app.
- Pair to garage door opener: Tap Next on the Pair to Motor screen.
- Read the warning and click Next.
- Use a ladder to access your garage door motor and tap Next.
- Select the brand of your garage door opener.
- Locate the learn/program button and tap Found It.
- If prompted, select the color of the learn/program button.
- This will be the same button you use to program remotes and keypads.
- Press and quickly release the learn/program button on your garage door opener motor head and tap Next.
- This will cause your garage door opener to move
- Finish setup: When the garage door opener is paired, tap Next.
- Name your garage door and tap Next.
Step 7: Mount the Hub
- Mount the hub per the app instructions.
- You can watch the video below or follow the in-app steps provided.
- Tap Finish when you have successfully installed the hub.
- Tap the garage door in the app to activate the door.
Note: Do not operate the garage door opener until installation has been completed.
Troubleshooting⬇️
Try these steps only if you encounter an error when setting up your myQ Smart Garage Hub or Smart Garage ControlSmart Garage Hub
Smart Garage Control
Erase Wi-Fi Settings
Erasing the Wi-Fi settings allows you to reset the Wi-Fi settings on the hub.- Check the LED status. The Green LED MUST be on or blinking to erase Wi-Fi settings.
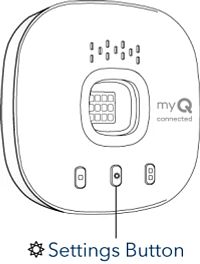
- Press and hold the Settings button on the hub until the blue LED blinks, indicating Wi-Fi is ready to be set up.
- Reconnect to Wi-Fi following the in-app setup steps.
Factory Reset
Setting the hub back to factory default erases the Wi-Fi settings, door sensors and removes the garage door opener from the myQ account.- Press and hold the Settings button on the Wi-Fi hub until the blue LED blinks then release.
- While the blue LED is blinking, press and hold the Settings button again until the hub beeps. The Wi-Fi hub is set to factory default.
Video Guides
How to Install and Set Up the Chamberlain Smart Garage Hub
How to Install the Chamberlain Smart Garage Control
Find Help By Product 

View More Brands
